And let the building begin!
Now that I had obtained everything in The shopping list I was ready to begin. One of Mrs Shunter's friends who was into picture framing was kind enough to drop over and loan some framing jigs, so I gave Mrs Shunter notice I was going to turn her lovely patio into a Man Cave and make a mess that weekend as there was wood to be cut.
Below is my process of some bushy style carpentry works I had a crack at to get my model rail layout up and running.
Preparing the Frames
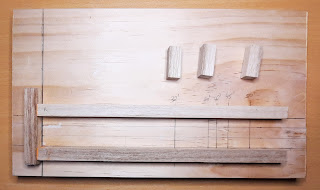
 | Sorting out lengths for
optimal straight
lines and cuts |
|
 | Loose fitting
and surprising
myself with straight
cuts with a circular saw.
|
|
 | All snug in framing jigs
and ready for final screwing |
|
Baseboard
 | Loose fitting Baseboard
to confirm everything
square before screwing
with 10G x 75mm
countersunk screws
|
|
 | Baseboard screwed to
frame with 8G x 40mm
countersunk screws
|
|
 | Baseboard screwed to
frame with 8G x 40mm
countersunk screws
in attempt to minimise
amount of screws |
|
 | Pre-drilled holes
for Baseboard legs
|
|
Legs
 | Still sorting out lengths
for optimal straight legs
and optimising cuts
to avoid waste.
|
|
 | Marking center
on foot of leg
|
|
 | M6 Levelling Foot
and Tnut |
|
 | Levelling Foot
finally installed
|
|
Installation
 | 3 Baseboards built
before the legs were
built
|
|
 | Here I brought 2
baseboards together
and was very happy
with the clean join.
|
|
 | End to end view of 2.4 meters of beautiful hardwood
and world of endless opportunity ahead. |
|
For the eagle eye amongst you reading my blog post, you may have noticed I am one baseboard short of the intended four baseboards I had planned to build as outlined in A modular approach it is!
All I can say is you've got to roll with the punches, keep moving forward, adapt and pour another Rum.
Until next time, see you at the next blog!

Comments
Post a Comment