The shopping list
Baseboard Plywood ✔
After confirming A modular approach it is! I decided I would source a good quality baseboard and go for a hardwood, found a local supplier close to home so I popped into the shop. The gentlemen who came to the counter was the owner and took me outside to the warehouse and showed me all the sheets he had available. He asked what I needed the sheet for and he said most model railway people go for the 9mm or 12mm and suggested the 9mm was good if I wanted to keep cost down, but I felt the 9mm was a bit more flexible and when asking for a quote, there wasn't much difference in price. The shop had a cutting service so I gave my measurements and placed my order for 12mm and was told the order would be ready the following week as the sheets outside were already committed to existing jobs.
Tools ✔
I did surprise myself as I had enough tools available to build. I used this site as a guide on what I may have needed Building a baseboard — Model Rail. Luckily in the end I only needed to buy a Square and a Countersink Set so sourced them from Bunnings and also borrowed some quick release clamps from my Dad.
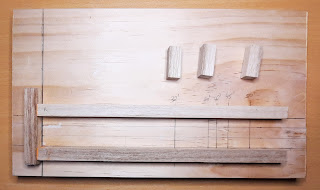
Framing ✔
This is an interesting experience, I remember as young lad going down the local hardware with my Dad and strips of wood would be up the back in various sizes and wood types, but for some reason I found this very challenging to source framing timber. There is Dressed All Round (DAR) and Finger Joint timber which costs a fortune, and is probably best for furniture and when asking at certain shops, which I won't name, if they stocked 3x1 or 3x2, it was like I was from another planet! Our English and American friends seem to have a better selection of timber than us Aussies.
When I was in the local club visiting, I remember seeing them using treated framing timber used for houses which they were using to build their benches. I didn't need treated as my layout would reside inside my home. So again, headed down to Bunnings and found they stocked 70 x 35mm Framing MGP10 Untreated Pine in 2.4m lengths. I was like a rat in the rack looking for the straightest pieces when a young bloke walked past and I said how many of these do you think I can get into a Toyota Corolla Sedan, he confidently replied 6 if you want to get home without talking to the local law enforcement.
Now 2 things were going to happen, either he was going to be right, or I would be sitting in the Bunnings car park late at night waiting for someone to help me get the wood home. Sure enough, he was right and the next trip I managed to squeeze 7 lengths into the car which resulted in a late night of game of Tetris trying to store the wood in my house so it would not become a trip hazard.
Consumables ✔
The following day after getting my first delivery of framing timber home, I got notified my baseboard order was ready, so I picked this up the next morning and decided to start work early so I could go back to Bunnings that afternoon and get all the bits and pieces I needed to start building on the next weekend.
I picked up the following packs, hoping this would get me the desired outcome I had in my mind:
| Baseboard Top Fixing | 8G x 40mm Screws |
| Framing & Leg Fixings | 10G x 75mm Screws Spring Washer Washer M4 x 80mm Bolt & Nut |
| Leg Supports | Levelling Foot 25mm * M6 M6 Tnut |
Excited things were starting to progress and maybe a rush of blood went to my head, I decided to go down and see my local model rail hobby shop owner to discuss points as running a loco along a piece of flextrack the novelty was running out.
Points are interesting item in the hobby and I am not going to try and explain them as I am not an expert and there are enough articles on Insulfrog, Electrofrog and Unifrog Points on the web to confuse or educate you about them. Upon visiting, I was in luck, a fresh order of PECO products had just arrived in the shop. I purchased Right Hand Points SLE-1495 (Qty 2) and Left Hand Points SLE-1496 (Qty 2).
Lucky for me I just get one choice which is Electrofrog and my biggest challenge is how I decide to wire them into the layout which is a future problem for Little Shunter. To avoid any issues, I purchased a pack of Insulated Rail Joiners SL-111 in order to muck around and avoid shorting anything and to help myself as I taught myself how to properly wire things up.
Until next time, see you at the next blog!

Comments
Post a Comment